Typing down for 8-9 hours in a day never gives rest to your fingers. The same happens with your mechanical keyboard when you type down the keys or work for more than 8-10 hours every day. Even if you have ergonomic keys, they are not capable of delivering you with the highest standards of comfort after two or three years of use.
Replacing the mechanical keys is a mandate after such frequent use. But if you want to do this step all by yourself, you need to know how to remove them. If you’re looking for the same, this guide on how to remove mechanical keys is all that you need. Make sure to follow all these steps so that you can get effortless results in changing the keyboard.

Table of Contents
Why to Remove the Keyboard Keys?
1. Cleaning
Just below the keys, there is a board and other switches present as well. It is important to remove the keys so that you can clean this board. Sometimes, due to the external airflow, the switches inside may be filled with debris and dust. This will result in slow function of the keys.
When you take out the keys, you will be able to get a clear picture of this area. This will help you to directly clean the board with the help of a cotton swab or an air blower. It also increases the life of a keyboard.
2. Rebuilding
Another reason why most people prefer bringing out the old keys is to introduce a new keyboard. When you use the keyboard for a lot of typing for your work, the springs may tend to get loose. They may not be able to function as smoothly as before.
Instead, some of them may be filled with dirt and dust. This is why, bringing up the keycaps is important. It can give you the chance to replace the keycaps with better quality. You can also change the switches which are needed.
How To Remove Mechanical Keys?
There are many ways by which you can bring out the keyboard or the keycaps. However, there are two common ways which are used the most. You can either take the help of some household items or take the help of keycap pullers to do your job.
1. Household items
There are a lot of household items that you can use to remove the keys. If you need to remove the keys, the items must have flat edges that will allow you to pull up the keys from the bottom. Some of the most common items are a flat screwdriver, scissors, butter knife or a house key.
You can take the help of the flat side of these products and then pull up the keys instantly. You will be able to easily remove the gum and then pull the keys up. However, it also involves the risk of damaging the keys while doing this procedure.
2. Keycap Pullers
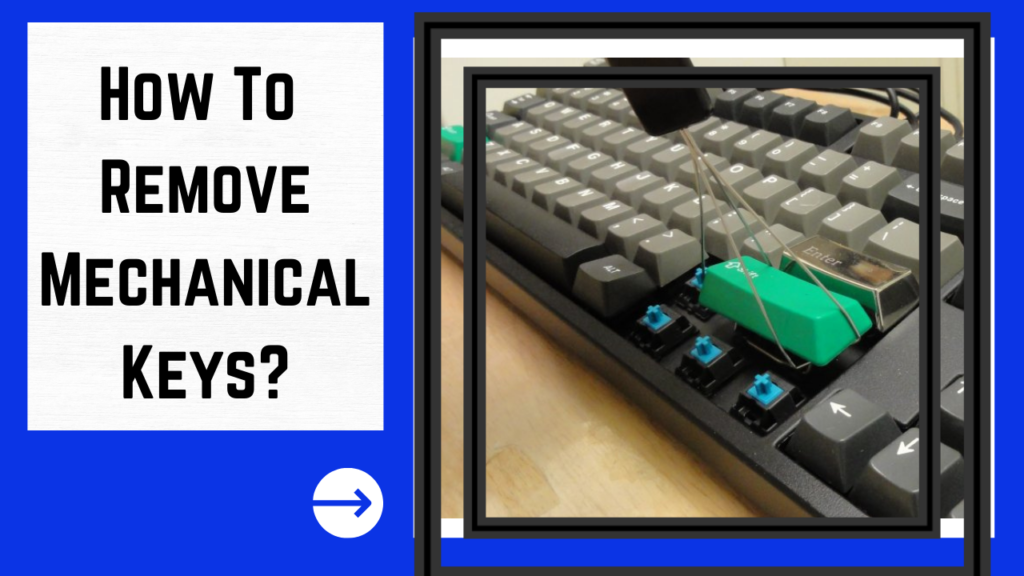
Keycap pullers are typically designed devices that help you to bring out the stuck keycaps from the keyboard. They may come with various designs and are easily available in the market. It is a specific tool that is used to complete such jobs with precision.
You can have the ability to lift the keycap from the corner or even from the top depending on the type that you choose. If you are getting confused to choose one specific type, you can also make a keycap puller for yourself. Below is a DIY guide that you can follow to make a keycap puller.
How to Make a DIY Keycap Puller?
Things that you will Need –
- You will require some paper clips. Grab about three of them.
- You can take the help of noise pliers or similar tools.
- Try to take a ruler that will help for measuring.
Steps to make a Keycap Puller –
Step 1:
The first thing that you need to do is to straighten the paperclips. You can do this easily to open up the body and then use a wire to join them. If you can’t do this by your hand, take the help of pliers.
Step 2:
Now you will have to make two equal paperclips and position them with 90-degree bends. Remember to keep at least a gap of 1 cm between them. You can repeat this procedure for all the three clips. Make sure they are equal in measurements.
Step 3:
Now the first bend is done. You will have to make more bends. Try to get one outward bend of 90-degrees. This will serve you as the handle of the puller. Make sure that you keep a similar measurement for all the pullers because you need to wire them up.
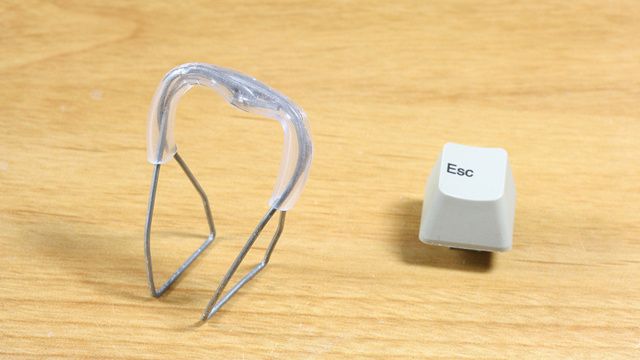
Step 4:
Once done, the structure is now complete. You will now be able to wrap up these boards together. This will allow you to keep a narrow gap between the two halves which will act as the pull. You can pinch the ends together to form a tension between these clips.
Step 5:
The next thing that you need to do is to straighten the whole keycap puller. If there are some loose ends, tighten them together and you will be able to make sure that everything is at the right place. You can now go further with the product and allow it to pull up the keys.
Tips and Best Practices for Keyboard Cleaning
- Always remember to pull up the keycaps slowly and do not go fast. If you are simply cleaning the board, accidental pulls may damage the keys. Make sure that you are gentle while pulling them up.
- Check the products that you are going to use. Although it is important to clean, using a liquid substance can make things go wrong. Be specific about using a dry cloth. Try to clean in a sanitized place.
To know more you can read this post on Best way to clean a mechanical keyboard.
How to Take Keys Off Keyboard? [Conclusion]
Changing the mechanical keys in a few steps is easy if you have a proper guide along with you. Replacements should be done often if you want to clean the keys or even if you wish to replace them. Remember to take them out carefully so that there are not many things to worry about.
You can follow this procedure mentioned above to get the best results on how to remove mechanical keys. Remember that you need to be very careful while placing the new keyboard.